Administering Your Email Domain:
Your email server follows the format “mail.yourdomain.com". So, if your domain name is busedge.com, then your email server would be "mail.busedge.com". This is important because this is the value you will use in Outlook for both your incoming and outgoing email servers, AND it is the URL that you will use to administer your email accounts (i.e. http://mail.yourdomain.com/admin).
In the case where your email server has not been switched over to us yet, you may use the alternate URL http://66.45.230.116/admin.
Once you connect to this URL, you will see the following screen:

This is the logon page to administer your email domain. If you do not see this login page, then your email URL may not be in place yet, and you should use the alternate url given above.
To login, your User name is your full email address, and your password is the password that you use for your email server. Once complete, press Login. You should see the following screen:

Note that in this example, there are several email accounts already set up. If this is the first time you are using this tool, you may only see your own email address.
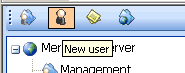
Create a New User
To create a new user, you will click the New User
icon in the Toolbar area.
This brings you to the following screen:

On this screen, you only need to fill out the top 5 fields in the majority of cases. This document only covers adding standard POP3 email accounts with the default options.
Here are the instructions for each field:
Alias:
This is the first part of the email address before the @ sign. So, in the case of jenny@yourdomain.com, the alias here is “jenny” (without the quotes). Note that multiple aliases can be assigned to an email account. So in the case where we want email going to info@yourdomain.com to also go to jenny, the Alias field would be as follows:
jenny;info
This means that any email destined for either email address (jenny@yourdomain.com or info@yourdomain.com) will be sent to jenny.
Username:
This is the primary name used for the email address in the account. So, in most cases, this will be the same exact thing as the alias. In our running example, the Username would be “jenny".
Password and Confirm:
This is the password that will be used to access the mailbox for this user. This password would be used in the Outlook configuration.
Name:
This is meant to be the full name of the user. So, in our running example, you could enter “Jennifer Walters” here. It is for display purposes only and does not affect how Outlook is configured or how emails are sent.
Once the above fields are filled out, just press the Ok button and the account will be created.